5 Things you probably didn’t know about your DSLR
 When you start photography, you learn a lot of features in the initial phase of learning. About shutter speed, aperture, ISO, White balance etc. Then all of a sudden, the learning stops or slows down. Why so? The reason is, after a certain level of understanding, most of the amateurs tend more towards just framing. But there are some features which remain unlearned by many amateurs. This post discusses the powerful but less used features of a DSLR.
5 Things you probably didn’t know about your DSLR
I will be discussing the importance and usability of the features in this post, not how to enable and use these in your camera. Because there are different ways of using them in different camera brands. Please refer to your camera manual for detailed steps of using them.
1. Back Button Focusing
Back button focusing is one of the most wonderful features. As we all know, the camera focuses on the subject when the shutter is pressed half way down. And when the shutter is pressed in full, it takes the shot. Enabling back button focusing makes it so that shutter button doesn’t control the focusing at all. Instead it assigns a dedicated button for focusing. And then, the shutter button is just for clicking. This is really useful when you have to take a lot of shots, but you know the focus is not going to change for every shot. With Back Button Focusing, you can set the focus once and take many shots as you want without refocusing again and again. An another useful example is when you focused anything and you are about to take the shot. Something suddenly comes between the camera and the subject. At that moment, the camera changes the focus. But if you are using the Back button focusing, no matter what happens, the focus remains fixed until or unless you want it to change.
2. Exposure Lock
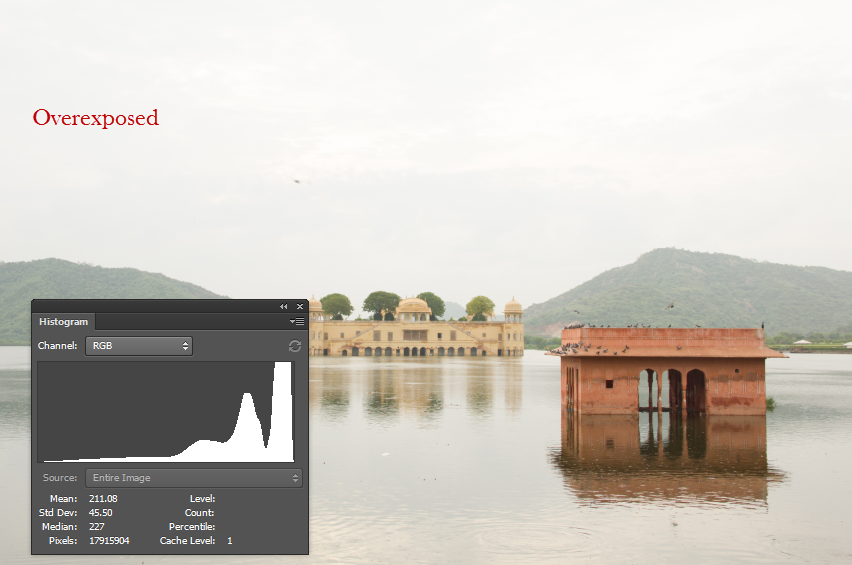
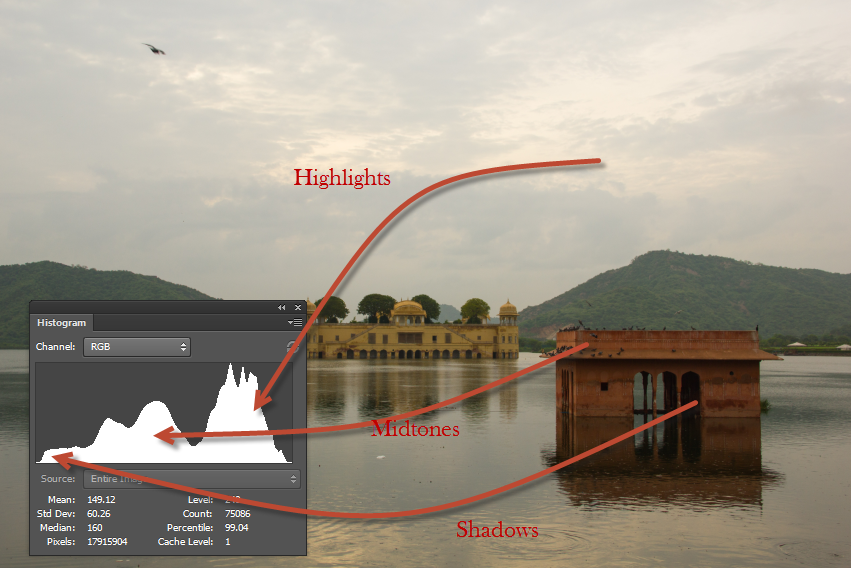
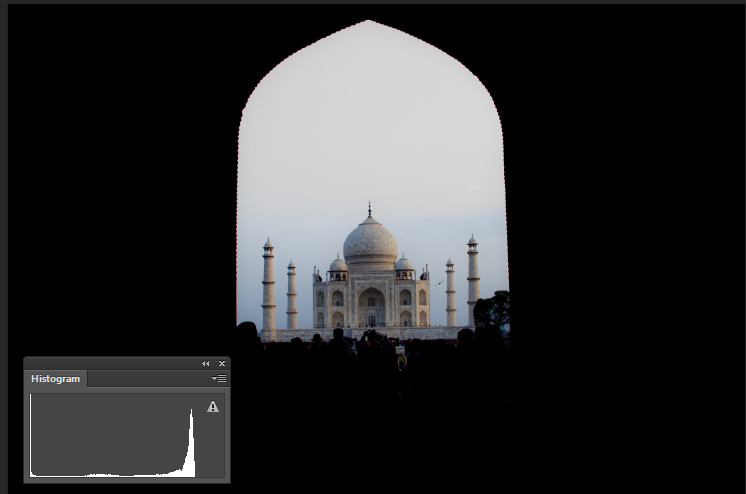
Exposure lock, if used properly, it can save a lot of time and give good results. It does exactly what it says. It reads the exposure from one frame and locks the exposure. And you use that locked exposure reading to click the picture of any other frame. This feature is useful when the area you are trying to capture has a dynamic range, and the light meter is easily confused. Consider the following example.
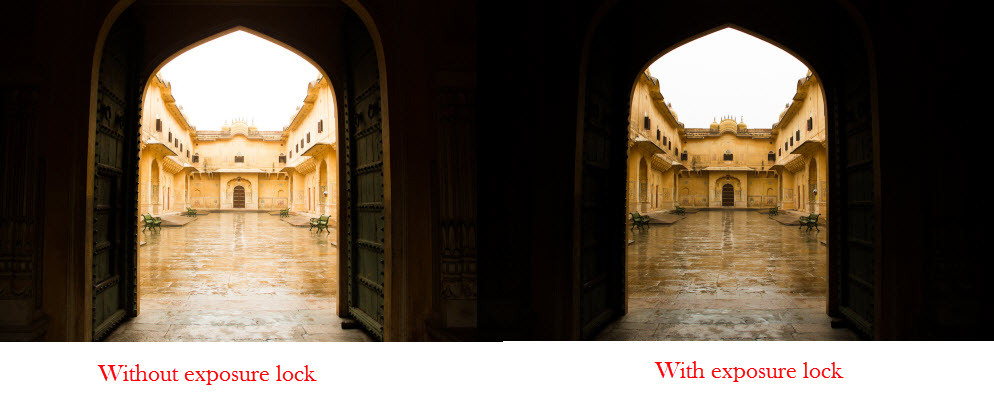
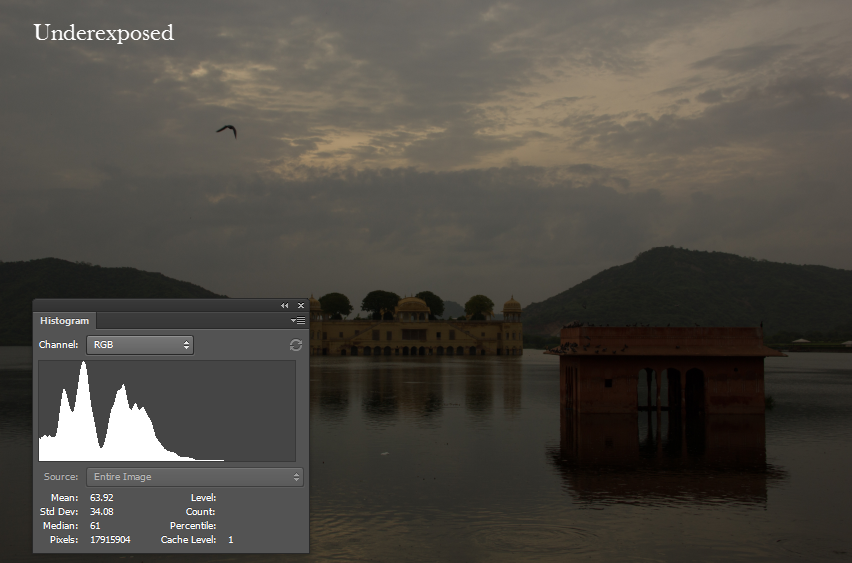
The image on the left is without exposure lock. It overexposed the highlights and showed some shadow details. But I didn’t want the shadow details. I wanted the details in highlights. So I took the camera outside, locked the exposure and then moved back inside. Then I took the shot. In that process, the camera used the exposure reading of the highlight area. ( the similar result is quite possible by using spot metering in this example. But this is just an example. Exposure lock and spot metering are different things. You can achieve many different results which you can’t by spot metering)
3. Custom White Balance
Setting up White balance is one of the important decisions we have to make while taking a photograph. The entire look and feel of the photo depend upon that. Many of us still use the AWB (Auto white balance). Before moving to custom white balance, let me tell you, stop using AWB. It is just crap. You should try other white balance options like Shade or tungsten with some test shots and see how that affects the picture. You’ll get far better results than AWB .
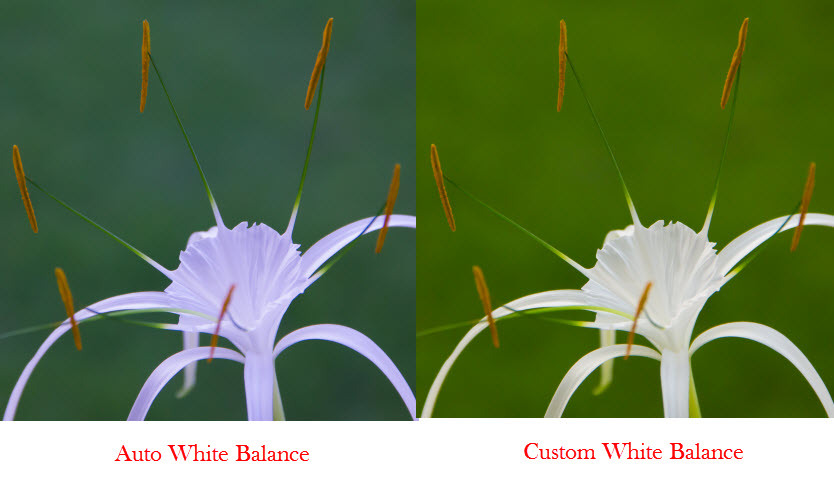
Custom white balance is one of the custom options in your camera. With a little practice, if used correctly, custom white balance can give you brilliant results. Simple words of defining Custom White Balance is, It lets you capture the colors the way they look to you in reality. You know the camera is not intelligent enough, it neutralises the colors. The colors you look in reality, AWB gets you something different in the picture. For setting up a custom white balance, you will be needing a calibrator for this, a gray card (or a white paper will do, but a gray card will get you more precise results). Now, most of you will say that we can adjust white balance and color correct the picture while post processing. But the question is, how will you remember the colors of the subject later.
Following example shows the difference between an auto white balance and custom white balance
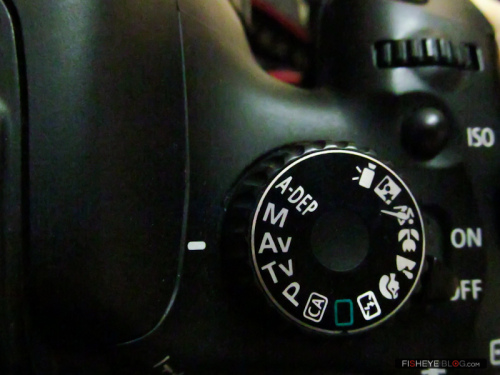
4. DOF (Depth of field) Preview
Depth of field is a common term to a photographer. It is the amount of distance between the nearest and farthest objects that appear in acceptably sharp focus in a photograph. Unfortunately, we cannot directly see the depth of field before taking the shot. That is where the DOF Preview comes into action. In almost every modern DSLR, we have a DOF Preview button. For many amateur photographers, this button does nothing but making viewfinder dark. But there is more on that. When you press the button, you will see a preview of areas in focus and areas out of focus. It saves time, because when you care about DOF in a picture. You can see the preview instantly in just one button press, rather than taking a lot of shots and deciding which is the one you need.
5. Flash Compensation
A lot of amateurs think that on board flash is just a piece of crap. Well, this is not true. Something is always better than nothing. You just have to know how to use it properly. Flash compensation is similar to exposure compensation. Like exposure compensation compensate the exposure. Flash compensation is a way to compensate the power of flash. It is fairly easy to use. You can increase or decrease the power of flash so that you will get the exact amount of flash light you need. Once you understand this. You’ll know how to use flash effectively.
These were few important features which are less used by most of the amateurs. But once understood, you’ll be one step closer to being a pro. I will be coming up with detailed articles on individual features soon.